Showing posts with label Prima. Show all posts

Friday, 15 September 2017

Smile!

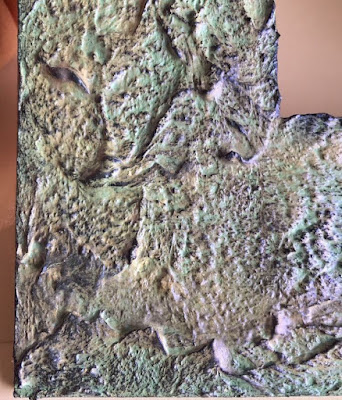
I made this photo frame using Fiber Paste by Golden.
Golden Fiber Paste is an opaque, viscous medium that dries to a surface similar to rough handmade paper. When dry, it has an off white colour and is very absorbent. You can give it a smoother finish either by skimming it with a wet palette knife before it dries or by applying it to a smooth plastic surface. Adding acrylic colours, watercolours or inks will give it a pastel tint. It has a sticky feel when wet but once dry, Golden Fiber Paste provides a good surface for pastels or pencils. It is very light weight and can be used in a die cutting machine or scissors.
I used paints by DecoArt adding a top coat of Golden Iridescent Pearl Coarse paint to give a sheen finish.
Finally I used Prima Resin Angels to complete my frame.


Thursday, 1 October 2015

October Challenge - The Craft Garden

Details of this months challenge at The Craft Garden can be found HERE

This month I made a large tag (size #10 from PaperArtsy).

Firstly I used a mask and distress ink pads to create a soft background before adding a black line edging with a journaling pen.
I then cut out what felt like hundreds of leaves in 5 shades of autumnal colours and arranged them adding some cream coloured dried grass.

I had the huge flower (Prima) in my stash and used it as a focal point. I then added a title and hessian at the top of the tag. 

Monday, 24 August 2015

Remember 2 Live Your Dream

Back in May I was lucky enough to attend a workshop with Claudia Neubacher
The workshop was held at That Craft Place.
We used two mini canvas' and DecoArt products.
I used a Prima spark plug embellishment to represent my hubby who is a huge motor racing fan and flying related embellishments to represent our son who is a pilot.
It was a great day and it was truly lovely to meet Claudia.

Thursday, 13 August 2015

13th August Scrap Thursday Part 11


This is the eleventh scrapbook page for my new weekly post Scrap Thursday. I will try and bring new ideas and techniques and revisit old favourites too. If you have any suggestions or requests just let me know and I will do my best to accommodate these.  
I usually work in a 12" x 12" format as this allows me more space to experiment and get arty!
This week I dug out an old photograph of a very old friend! Leanne introduced my husband and I to each other back in April 1989 and the rest as they say is history!
The layout is 12" x 12". I started by covering a piece of card stock with torn pages from an old book.
Using Grunge Paste and a Dutch DooBadoo mask, I added texture to the middle part of the card.
I diluted Luminarte Silks and brushed over the Grunge Paste.
Building up the colour.
 I added silver Gilding Flakes and Stampendous Frantage randomly together.
I added Dylusion sprays to the mix.
I used Tim Holtz Sizzix Dies and coloured the cut outs using Silks and a Smoothie (which is an egg shaped sponge for blending)
Prima flowers and resist canvas pieces were coloured with Dylusion sprays.
Petaloo flowers were coloured with a mix of Dylusions sprays and Luminarte Silks and layered up. After all this I attached it all to the background using a strong glue.
At the moment the fashion is to use very pronounced embellishments and flowers which if you are putting the layout into a box frame is great and works well, however if you are putting your layouts into an album these pronounced items can cause problems. Layouts can get squashed and if metal is used photographs can be dented. 

The photograph above shows how what I do with flowers that are deep. I basically cut a hole into the card, add glue to the edge of the hole and push though the bottom of the flower. Once the glue is dry I cut off the excess from the back using a craft knife. This is no way affects the way the flowers look but does help other layouts in the album.
I am really pleased with end result and I hope Leanne will be too!

Wednesday, 1 July 2015

July Challenge - The Craft Garden

You can find details of this months challenge at the Here
This is a 12" x 12" scrapbook layout of the beautiful Mel.
I used freebie paper from Scrapbook Magazine (the fans), I cut the fans out from the background paper so I could use my own painted background.
I used Fresco paint from PaperArtsy and a brayer to apply it randomly over a sheet of Bazzill card stock.
I also used embossed card and smooth white Bazzill to get the finished look.
I cut out pendants using Sizzix dies for the title.
These flowers are by Jofy at PaperArtsy, coloured using Copics and the word embellishment is by KaiserCraft.
I added a metal bird cage by Prima and finished it off using sparkly brads. 

The overall affect is very soft and pretty, just like Mel!

Sunday, 1 February 2015

February Challenge - The Craft Garden

Below is a step by step pictorial guide of how I made the above layout. I made this for very good friends of mine after their first visit to Paris. I am really pleased with the overall result.
 I used Faber Castell Gelatos for the background.
 A good coverage is needed.
 Choose three colours that tone.
 This page has to be as a mirror image, do one page completely first.
 Using a baby wipe, blend each colour individually, make sure the colours do not bleed into one another.
 Gelatos are a messy medium, make sure you have plenty of wipes to hand!
Now choose the blending colours.
Don't be afraid to be bold, colours will be soften using a wipe.
 Now make a mirror image of the first page.
 This is a little time consuming but well worth the effort to get the finished result.
 Start building the background using stamps and stencils.
I used Big Brush Pens to colour in.
 I used a white POSCA pen to add highlights.
Add embellishments relative to the theme of your layout. I used embellishments by 7 GypsiesDutch DoobadooIdea-ology and Prima
Crop and mount photographs and stick in place, I do this after I have added the embellishments to make sure I keep the photos clean, if you are a tidy scrapbooker feel free to add first!
I simply had to add the crowns and how lucky was I that they fit perfectly!

If I have forgotten anything then please email me and I will do my best to answer your questions.